As we went through the process of developing the construction drawings with Turkel we made some changes to window sizes and locations to (a) improve potential airflow through the home, (b) improve privacy, and (c) accommodate limitations of another product line we decided to include in the package. Once the windows were on site and they started to go in we learned about implications of some decisions we had made without knowing we had made the decisions.
In the initial design all three bedrooms had operating windows on only one wall (the master had a tall/skinny window around the corner of the main wall of windows). That did not make sense to us, and the next iteration had two windows either side and adjacent to a corner of one bedroom. The discussion with Turkel was about airflow you get when you blow on a straw while you have your thumb over the other end of the straw. So we added some operating windows and tried to get them on opposite sides of the rooms.
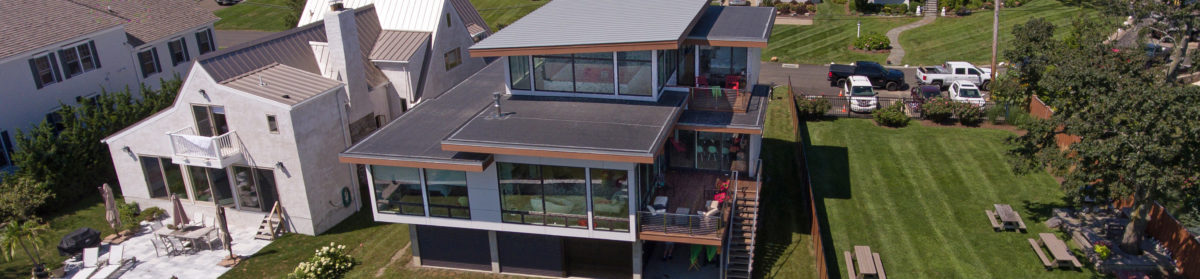
The home is on the water and SSE facing, and most of the south and east sides of the home are glass. The prevailing breeze in the summer is SW, and initially there was no nice way to open up the north side of the home without propping the front door open. So we added some windows to the north side, including a large operating casement adjacent to the front door (more on the front door in another post). We also added a high window to the powder room, over the commode in the master (giving windows on two walls of the master bath, up high for privacy, but adding natural light and operable for airflow), and a couple of small high windows in the mechanical room.
The Marvin Ultimate window package was not an insignificant cost that was not broken out in the Turkel purchase order, and we tried to get some visibility into that cost as we looked at making changes to the window package. This process was slow and difficult, so we started talking to other suppliers to try to get some cost granularity. During those efforts a couple of suppliers suggested that (Marvin) Integrity windows might outperform Marvin Ultimates and also save some money. Ultrex windows are strong, resulting in small rails and so larger openings, and are not susceptible to corrosion, so ideal for water front homes. Turkel had limited experience with this line of windows and it was a process to bring them up to speed of what was possible and what was not possible. Fixed Integrity casements are available in sizes up to 49 sqft, which is about as large a window as I’d want to have. The size of Integrity awnings is limited compared to Ultimates, so under large windows we doubled up Integrity awnings (so more smaller operable windows, which was fine with us and has worked well in practice), and for large awnings and a multi-slide assembly we stayed with Marvin Ultimates. The Integrity were available with wood on the interior, as well as Ultrex (we used the latter for bathrooms and laundry and mechanical rooms). All windows were available with square sticking and the exterior bronze color of Ultimate and Integrity windows is VERY close. I think more factory mulling gets done with the Ultimate windows, for our Integrity windows steel was installed for at least some of the mulling (maybe partially negating some of the cost savings, but again in a salt air environment I think I pick Ultrex over Kynar coated aluminum). The Marvin Ultimate hardware is a little nicer than the Integrity, but the Integrity is still quite OK and you would not really notice much of a difference unless it was side by side. The awning control handles are both metal, but on the Integrity the locking levers look like they are metal but they are plastic (on the all Ultrex they are white plastic).


On the stuff we learned about after the windows were on site, that was around jamb extensions and how the window frames were placed in the rough openings. Here is where we started to learn how finishing details could have huge cost implications. For the interior window to wall transitions the plans called for two pieces of trim, one of which was dadoed with the drywall going into the dado. Clearly a ton of work and our construction manager was puzzled by the design. If we were going to bring a jamb extension past the drywall I did not understand why we did not just have jamb extensions built into the windows by Marvin, then bring the drywall up pretty tight and use tear away beads to finish, that would have been a lot less work. The typical finish would be to install a jamb extension bringing the jamb flush with the drywall and then banging some casing around the window. None of these approaches seemed to be very clean to me, clean and minimal was a core tenet of the whole project. So we ended up using drywall for the “jamb extension,” using a tear away bead for finishing at the window jamb and a corner bead at the drywall to drywall corner (much as you would handle the outside corner of a wall). Still a lot of work (and cost), but a much cleaner look.


After the windows were in we learned about the importance of how those are placed in the rough openings. The plans called for 1×3 furring of all exterior soffits and interior ceilings. Our construction manager thought it was a waste of time and money to add furring to all of the joists for the ceilings, and installing furring on all of the (pretty extensive) soffits was not going to be cheap. If you did one and not the other the interior to exterior transitions at the windows would have a 3/4″ step from the side with furring to the side without. We decided to skip the furring and deal with gaps that might require trim on the exterior.
During the development of the construction drawings we had been discussing cladding options. On the lower level our thought was to have corrugated break-away aluminum panels between the concrete piers, and we had the idea to bring this aluminum up at a corner of the house to provide an accent to the main cladding (Cembonit cement board panels, more on that in another post). What I did not realize was that as a result of floating the idea of the corrugated aluminum we signed up for 2×4 furring for the cement board rain screen siding. So windows were installed with frames sticking 1.5″ out from the sheathing, so they would be flush. We ended up skipping the idea of the accent corrugated aluminum, instead using Trespa, which would install much as the cement board panels. A 1.5″ rain screen gap seemed crazy to me, though it might have been nice for bird nests. We went with 1x furring, so our window frames project 0.75″ beyond the cladding. Not the end of the world, still looks OK, but during the development of construction drawings I think it would be good if architects highlighted choices being made that have major cost and/or aesthetic implications.

Also not sure who picked out the trim for covering the mulls, it wasn’t us, I probably would have picked flat/plain trim. This is what came with the windows, maybe it was a standard/default thing. One of those things that I realized when it was ready to go on and there were bigger battles to fight …
